Your cart is currently empty!
Filling in 3D printing: what do we need to know?
Do you know what sets 3D printing apart from most other manufacturing techniques? That while you’re printing with 3D printeryou have control over the simultaneous construction of both the outer walls of an object and what fills it. In this case, the walls form the outermost layers of the part you’re building. The material between these walls is called the infill.
In 3D printing, the filler plays a key role in the strength, structure and weight of the part you are making. What’s interesting here is that you have the ability to define a number of parameters that govern the type of this filler. The two most important of these are fill density and fill pattern. These are what we’re going to look at today.
But first, let’s see why filling is so important for building 3D models.
3D printing vs traditional manufacturing
Filling in 3D printing is different from other, more traditional manufacturing methods. To explain the difference, we will use injection molding and subtractive manufacturing as examples.
Injection moulding is done by inserting material into a mould to form parts. The catch here is that it is virtually impossible to control the internal structures. As a result, the parts end up either too rigid or hollow.
On the other hand, subtractive manufacturing, such as CNC milling, involves cutting material from a larger piece. Like injection molding, the fill cannot be adjusted because the interior is too hardened.
This is what makes 3D printing so effective. Because it involves selectively extruding material, you don’t have to face similar difficulties.
Now that we’ve understood why fill is less important in 3D printing, it’s time to look at the different types of fill densities and patterns.
Density
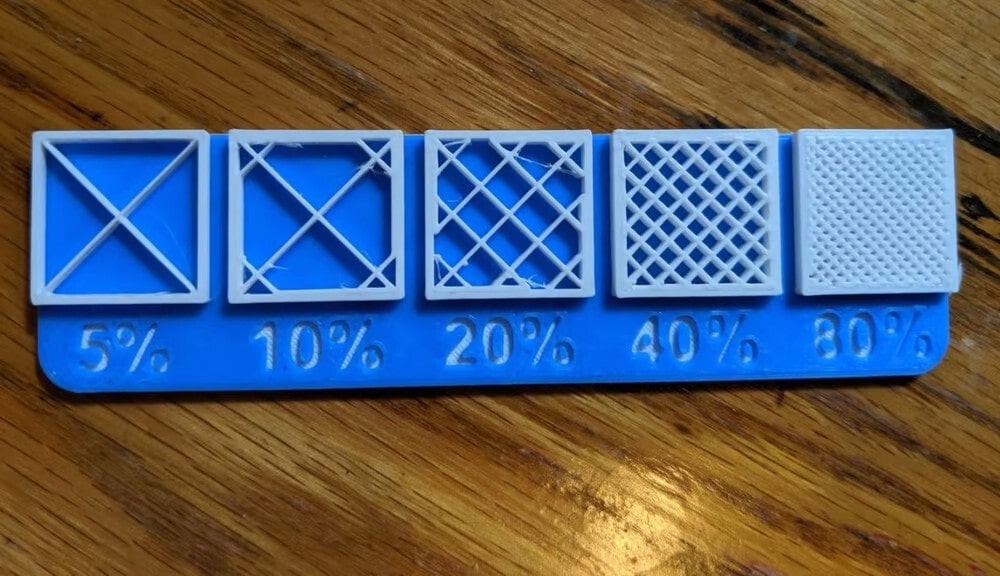
The fill density is the “fullness” of the inside of the part. In slicers this is usually defined as a percentage between 0 and 100, with 0% making a part hollow and 100% completely solid. By way of logic, this has a big impact on the weight of the part: the fuller the inside of the part, the heavier it is. In addition to weight, density also affects printing time, material consumption, and buoyancy.
Some slicers allow different fill densities within the same part. This is known as variable fill density, and specific settings in the slider program allow you to set different density changes for different areas of the pattern you are printing.
What density to choose?
For most “standard” 3D printed models that don’t need to be super strong, a fill density of 15% to 50% would do a great job. With this density percentage, the print time is not too long, material is saved and good strength is provided.
If you are making more serious items, it would be better to increase the density above 50%. This will increase the 3D printing time, but you will end up with a solid and heavier part.
But if you’re building smaller figures and don’t want them to be heavy or too rigid, a density below 15% will work just as well. Plus, your 3D model will print much faster and consume much less material.
As you can see, different densities work well for the type of items you are printing. Keep in mind, however, that the lower the density, the more flexible your shapes will be.
Recommended density percentages
- Standard models: from 15% to 50%
- Functional models: from 50% to 100%
- Smaller figures and models: from 0% to 15%
- Flexible models: from 1% to 100%
Template
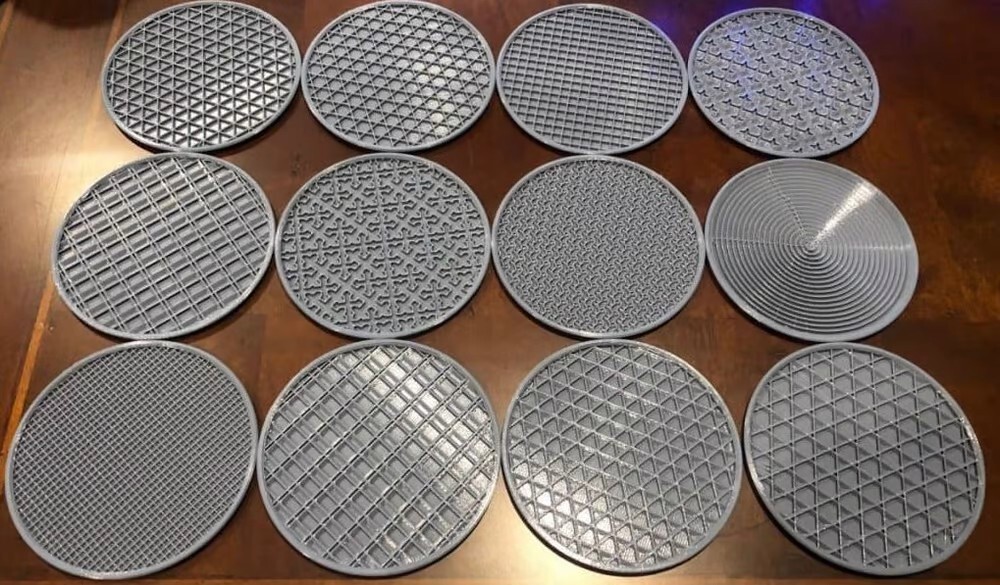
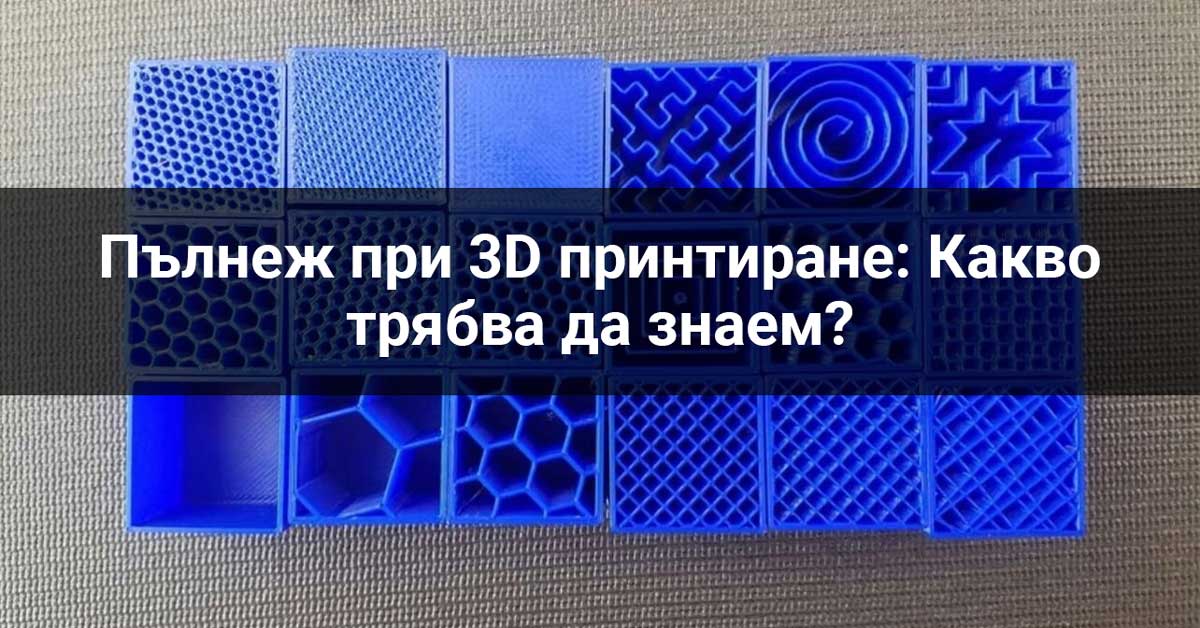
The fill pattern is the structure and shape of the material inside the 3D model. Ranging from simple lines to more complex geometric shapes, patterns can affect the strength, weight, 3D printing time, and even flexibility of the part.
Like fill density, some models are better than others for certain functions. Different fill patterns have different features, such as complexity, material efficiency, and number of bond strength planes (2D or 3D).
Which template to choose?
By looking at the different types of templates, you’ll be able to choose which one would work best for you based on the type and functionality of the elements you’re building.
Lines: This template contains lines printed in one direction (along the X or Y axis). This provides robustness in only two dimensions, which is effective for quick prints. The lines don’t use too much material and keep the weight fairly light.
Honeycomb: As the name suggests, this stencil creates a honeycomb structure, which makes for an interesting visual effect. This type of filling is good for semi-fast prints that require moderate strength and don’t require the consumption of too much material.
Network: The grid resembles the appearance of lines, but instead of one-dimensional lines on each successive layer, this template contains two-dimensional lines on each layer, with twice as much space between the lines. This provides two-dimensional robustness, but is still somewhat strong. The mesh stencil consumes an average amount of material and takes an average amount of time to complete.
Triangles: This pattern looks like overlapping triangular lines, with lines going in three directions in the XY-plane. This provides strength in only two dimensions, but is efficient for prints where more solid strength is needed.
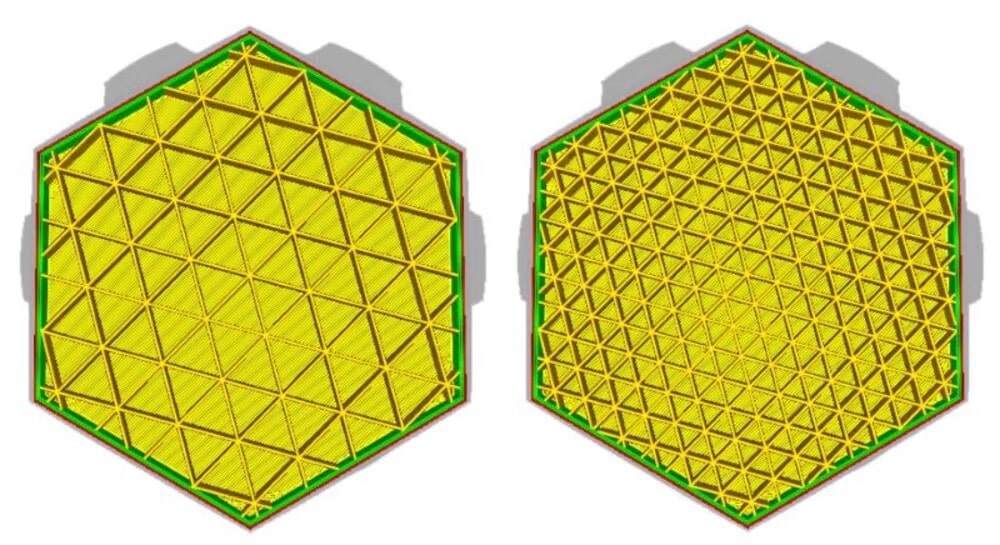
Tri-hexagon: The three-hexagon fill template contains a set of lines going in three directions in the XY-plane, creating hexagonal patterns with triangles in between. This pattern provides strength in two dimensions and is effective for strong prints.
Cube: This model produces stacked cubes, but because they are tilted 45 degrees about both the X and Y axes, they look more like triangles at any given time. The pattern provides excellent strength in three dimensions, but takes a little more material and time than the others.
Octet: The octet is similar to the cubic pattern, but instead of increasing the oblique triangles, the pattern materializes as squares. This pattern is three-dimensional, which is extremely useful for parts that require serious durability.
Giraeoid: The gyroid pattern is probably the most attractive looking, but also the most common fill pattern. It involves concave irregular curves that intersect. This achieves an optimum balance between strength, material and printing time.

Concentrated: A concentric pattern is an internal structure composed of concentric lines that coincide with the outline of the element(i.e. its perimeters). This pattern prints quickly, is good for flexible parts, and consumes significantly less material than most patterns.
Recommended settings:
- Standard Patterns: Mesh, Triangles
- Functional models: cube, gyreoid, octet
- Smaller shapes and patterns: lines
- Flexible patterns: concentric pattern
Other important parameters in 3D printing
In addition to density and fill pattern, there are two other key categories of fill settings: variable settings and artistic patterns. What’s interesting about both of these is that they allow you to be more creative with fill settings.
Variable settings
Variable settings allow you to adjust the fill density as the part advances in layers. For example, if you want the base of the 3D model you are building to have 10% fill up to layer 30 and then advance to 50% fill, the variable settings allow you to do this.
Artistic templates
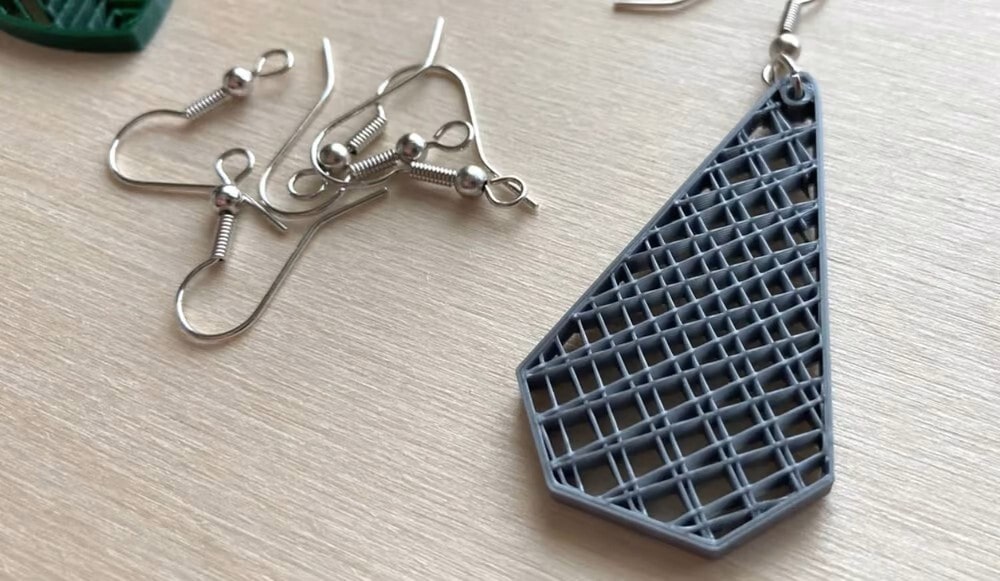
Art stencils help you turn ordinary stencils into a true work of art. This would be extremely useful if you are making jewelry or other decorative patterns.